Showing posts with label free. Show all posts

Thursday, May 15, 2014

Nouns {Using the Grammar Farm}

This week I introduced some work on nouns with the Grammar Farm. The Grammar Farm is more or less what it sounds like- just a farm with word labels to help teach grammar. You could use a dollhouse or train set- you just need a setting and objects. 

How to Introduce Nouns:
Before we pulled out the farm, I took a minute to introduce what a noun is. We played a game that I called "Find me Something." Ask them to find you an object. When they come back with an object, say "oh I'm sorry, I meant bring me that pencil." After a few times around I got a few giggles and a concrete example of how we use words to name things. These things are referred to as Nouns. This is a great time to introduce a word card with "Noun" and a few noun words along with the black triangle symbol for noun. 


DIY Grammar Farm


Putting it Together:
Farm Animal Set (I like the Farm Animal Toobs, our craft store had it for a lot cheaper)
Setting (a barn or you can make a mat like we did)
Labels from Montessori Print Shop (print with the colors or use the b/w labels and attach to colored cardstock, Nouns are on Black)
Grammar Symbols (make your own or purchase)

When to Introduce:
after they have been working on the Blue Reading Materials. This would be when they can easily read many of the animal words without pictures. 

How to Introduce:
1. Tell them that you have something new to show. Reference the work you did with nouns earlier. 
2. Pull out the animals and place them on the mat one by one
3. Pull out a word card and read it.
4. Place it next to the object.
5. Invite them to read a few more word cards. 
6. Finish the work cycle and put away all the cards and the animals in the designated area. 

This set will get you through all of the parts of grammar- it's worth it to have. I bet chances are you have a toy farm somewhere already! 


The layout for introducing the other parts of speech are similar but be sure to check back for when we work on adjectives and verbs!

Tuesday, May 6, 2014

Making Sense of the Language Albums

I'm not sure why but I think that the Language Albums have been getting a bad reputation. I don't know if it's the length or the cost of getting a pre-made set or just that's it's a little different than the phonics first reading than spelling approach most of us grew up with. I've spent the last month or so going through the manual, making the materials and introducing a select few to the kiddos. It's really not so bad! I'm just going to give an overview and share some resources that will hopefully help make it seem not so scary. 


-Sounds are introduced first not letter names. I know that it's next to impossible to keep kids from learning the names of the letters but if you refer to them as the sound it makes reading a lot easier. 

-Lowercase first. 

-Except for the Pink, Blue and Green reading the kids could be working on various sections at the same time. It is not completely linear. 


Preparation

1. Practical life exercises many emphasize going left to right (for the english language)

 2. Sensorial exercises  this would be matching, rhyming, opposites, puzzles, what's missing

3. Writing this includes activities to strengthen the hand such as the metal insets, peg boards, lacing, markers and crayons

4. 3 Part Cards these are used a ton in various subjects. For language the idea is to introduce the concept so they are familiar

5. Oral Expression Drama, Poetry, Songs and simply having a conversation are included here. 


The rest of the album is normally split up into the different levels of reading. There is Pink, Blue and Green. There is nothing uniquely special about these. They just go from easiest to hardest. 

Pink Reading

1. Initial Sounds sandpaper letters, sound cards, sound boxes

2. Word Building moveable alphabet (BUY or MAKE

3. 2 or 3 Letter Phonetic Words. word pictures, word lists, sentence cards and single word books. You can find a TON of resources if you look for "CVC" words online. This is the same thing. 

Blue Reading

1. Word Building with 4 or more letter words

2.  4 or More Phonetic Words word pictures, word lists, sentence cards, i spy, blue books

Green Reading

1. Introduction Digraph sandpaper letters, phonogram cards, phonogram classification cards

2. Reading word and picture cards and books 

3. Word Building All of these activities are done with the moveable alphabet and include topics such as consonant digraphs, homophones, silent long e. Find affordable options Here or (even better FREE

Grammar

1. Nouns noun box, animal farm, singular and plural

2. Articles "a" "an" "the" definite and indefinite

3. Adjectives noun adjective box, phonetic farm

4. Verbs verb game, noun-verb box, phonetic farm +verbs and Adverbs adverb game, adverb-verb box
5.  Prepositions, Conjunctions, Pronouns and Interjections are all introduced one at a time. 


Writing

Metal Insets, in the air, cornmeal, sound patterns, chalkboard, wide lined paper, capital letters sentence cards


Finding the Manual:

The Helpful Garden Free- she does an amazing job

Montessori Print Shop Manual and Language Bundles 


KHT Montessori You can purchase individual albums or enroll in the certification course. 

Tuesday, April 29, 2014

The Student Contract (Free Download)

 If you've spent any time learning about The Montessori Method you will realize pretty quickly that it does not allow for rewards or punishments based on work. 

So how exactly do you get the reluctant ones to accomplish anything in a day? Or anything other than science or reading or whatever their favorite thing is? 


This is one of the things that has drastically changed how we homeschool. It is essentially a guide that you work on with your kids, either at the beginning of the week or the beginning of the day, that outlines what they should/can be working on. 

We have tried out both methods- the beginning of the week and the beginning of the day. I find that for my procrastinator, daily sheets work a little better. It avoids the rush on Friday afternoon to get everything finished. For others, it may seems overwhelming and it would help to do it weekly. That would provide enough time for experiments or longer projects. The beauty is that it's totally customizable. We print off a dozen or so at a time and put them on a clipboard. After they are done they go into a folder. This also helps a ton with documenting work! 


Ideas for Making it Easier:
-number the favorites 1-3 and have them accomplish everything else first
-don't just write down what you want them to do, find out what interests them! If writing come easily, have your student write. if not, don't make it an issue, work on it together. 
-respect the level they are working on, you can always add notes later if you feel it should be harder
-allow time in the schedule. plenty and plenty of time. 
-some things won't get finished, talk about it! was it because they were working on something else? was it because they just sat staring off into space? 
-4 and up seems to be a good target age. 


If you have subjects that you work on that are different, make your own! This is just to serve as a guide. 

Tuesday, April 1, 2014

Discussing Elasticity, Plasticity and Rigidity


This is a really easy introduction to terms in physical science you can make as easy or as hard as you'd like. Traditionally, I would introduce them all separately. For Barrett we went ahead and introduced them all at the same time.

I set up a tray with the terms, objects and pictures. We discussed the definitions and than went on to find objects around the house.

Here are the basic definitions for you:

Elasticity: when something is stretched and returns back to the way it was before (elastic)
Plasticity: when something is changed and stay the way it was formed (clay)
Rigidity: something that does not stretch or bend (rock)


Name Cards and Pictures (Free- formatted to save some paper)

Searching for objects that display different features and recording on the camera. 

Extensions: you could make a friendship bracelet, weave, play with clay or build with blocks. 

Monday, January 28, 2013

Antioxidant Unit {Free Printable}

Has anyone else noticed how extremely difficult it is to find kid friendly information on antioxidants? 

Our Nature and Science Museum has this really great "Superfood Heroes" presentation where they learn all about evil free radicals and the superfood heroes that fight them. My kids love it. We've seen it like three times. 

But even there, when I asked if they had any more resources, I got a blank stare. Maybe I didn't ask the right person, who knows. 

Anyway, I figured I should just put together my own unit on them. A kid friendly one that didn't involve weight loss inspiration or essays on anti-aging. 

(click on the picture for the download)

I did have a bit of a hard time sorting through the information and still leaving it accurate. Some of the antioxidants we saw in the presentation were technically phytonutrients which are really a subsection of antioxidants.... I didn't want to group them together but I felt they needed to be identified correctly.

Anyway, I think I'm making it more complicated than it needs to be....

There are three sections of three part cards you can use as you like- one is the free radicals. The second are antioxidants. The third are phytonutrients and the foods they are found in. You can easily just print the page with the food and it's common name along with the page on the free radicals and be set!

There is also a control sheet in case the cards get mixed up. 

Next is a scavenger hunt. You can do this in your house or it would be a really fun field trip to the store. You wouldn't have to buy everything on it but it would make a great, super healthy, grocery list. 

Finally is a mini book of terms that should help with understanding what free radicals and antioxidants actually are. This is geared towards the 3-8 year old range. My kids seemed to simply accept that a free radical is bad without asking more questions. I was thankful- the reason why is a little more complicated and I don't plan on introducing atoms and molecules anytime soon.

I also put together a super simple chart for the kids to check off what colors of food they ate for the day. I'll use it with both my 5 year old and my 21 month old. Laminate and use a dry erase marker for everyday use. 

Here are some other resources to help your curious ones:
 Discovery Healthy Foods- adult oriented but really great pics.
Information for Kids on Antioxidants- for adults, but helpful


I really wish I could find a good kid friendly book on this topic. If you know of any, can you pass it along?  Maybe I'll stretch my creative side a bit and write one....

*I updated at least one error but there may be more, let me know if you find one. 

We are starting some work on the Circulatory System- look for that up next week!

Thursday, October 18, 2012

Pancakes, Pancakes! {Recipe}

"Hey! Let's make one. big. giant. pancake!" 
-Bear


We have been inspired this week by the book Pancakes, Pancakes! by Eric Carle. The book is about a boy named Jack who has to go get all the ingredients to make a big pancake.

 Pancakes, pancakes!


Here is a free printable version of the recipe for you!

Please don't host the file anywhere but you are welcome to link back to this original post!


This recipe is super easy to follow and Bear had a great time making it this morning.  He was able to mix the ingredients and pour it onto the skillet on his own. He shared some with all of us and was so proud to have made it mostly on his own! You can tell by the picture we burned ours a bit but we'll try again another day.


*note, this does work really well gluten free. we made it that way :) just replace regular flour with your gluten free flour mix and add 1/4 tsp of xanthum gum. We had a really fun conversation about what gluten free flour was made of and how that differed from the wheat in the story. I'm sure that it would work really well with a dairy substitute as well.


Monday, April 2, 2012

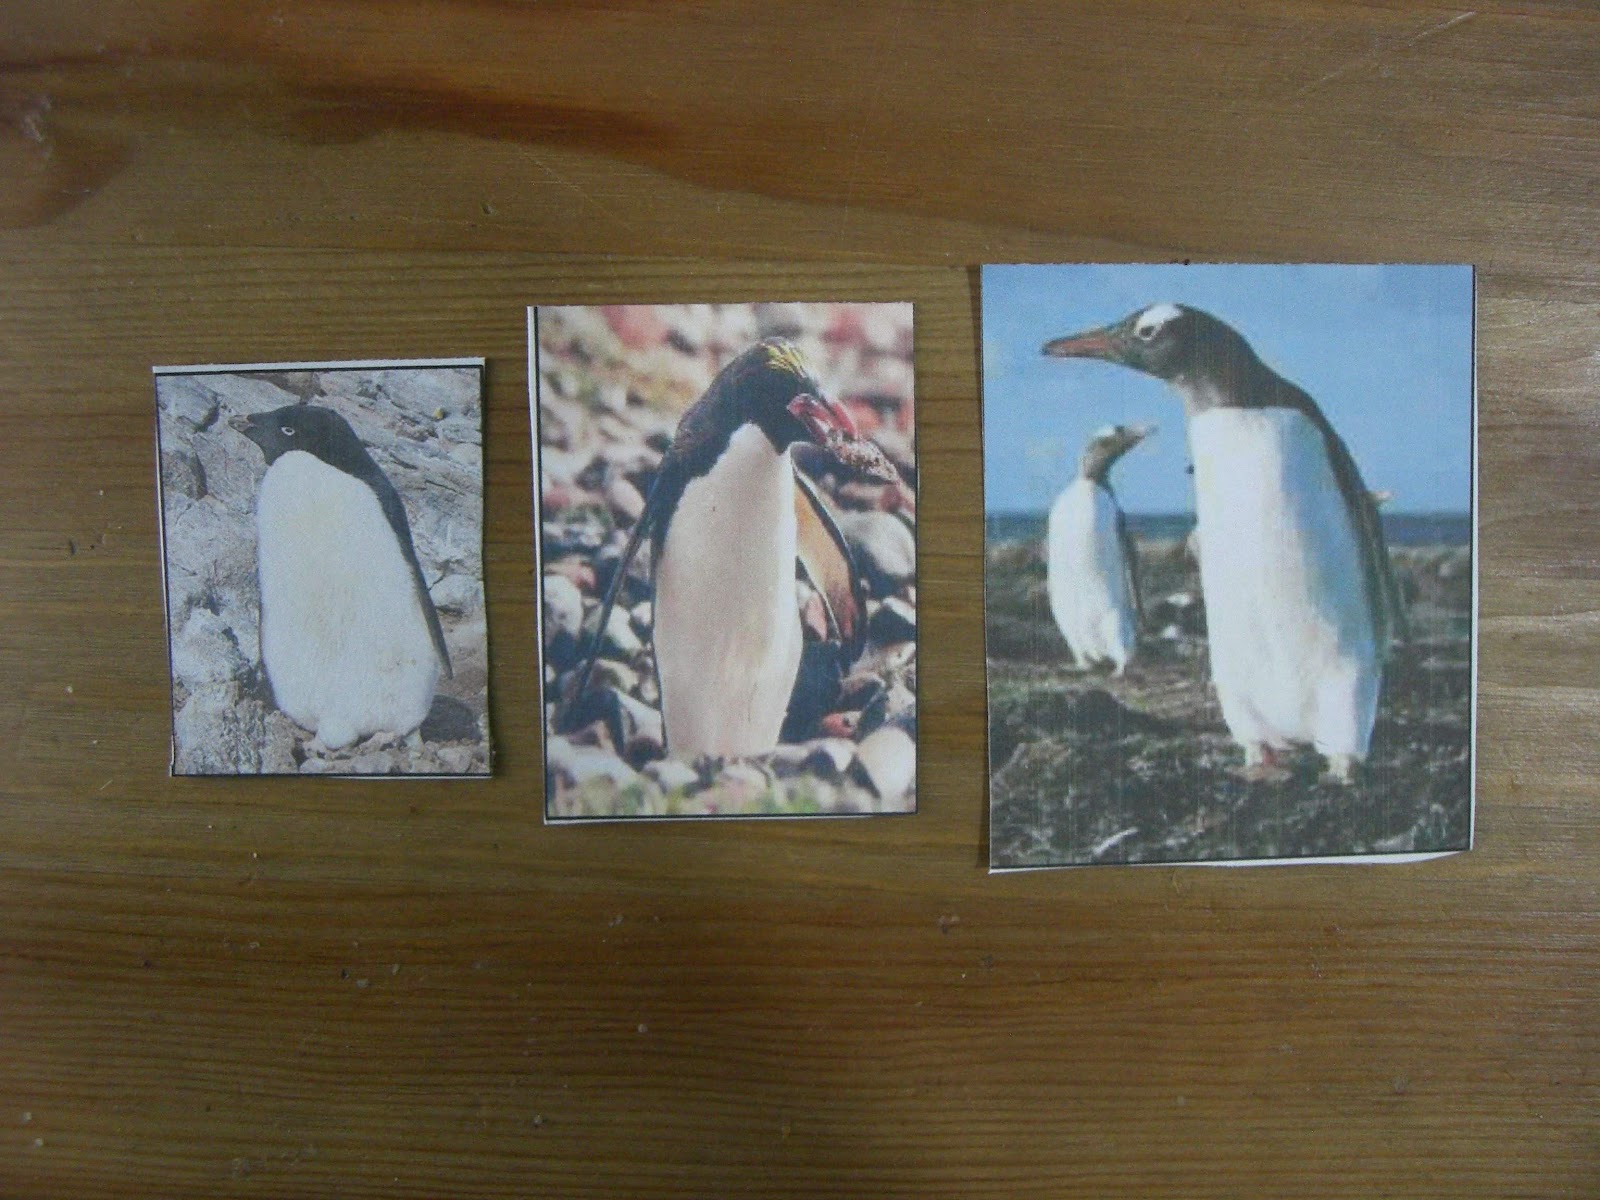
Penguins- 3 Part Cards and Activities

I really enjoyed pulling this unit together. We started by watching a live webcam feed of the penguins at Sea World. They have a really great question and answer time on Mondays at 12 EST. We also watched clips of Frozen Planet (we don't have a real tv, so we can't watch the full episodes until they come out on video) The clips were fantastic and seemed to old Barrett's interest for a while. Maybe even longer than sitting for the whole episode. 

Here is a really fun Sensory Box idea: 

I used rice, beans (for pebbles), a small tub of water, a sea lion and a penguin. It's all in an old swiffer refill box. 

Barrett had so much fun having the sea lion chase down the penguin to eat it. (I'm just going to assume that's a boy thing!) There is a pretty great clip of a sea lion and a penguin racing on land on the Frozen Planet website.  He was disappointed we didn't have any fish for the penguin to eat. So... if you have some fish, it'd be fun to add those too!


Here are some 3 part cards with 5 different types of penguins. I would really like to get a chance to make a little book of information on each type- hopefully I'll be able to get to that later in the week. 


3 Part Cards

Size Sort with Labels- I made them relative to what they are in real life. The Adelie being the smallest and the Emperor being the biggest. I also included a brief list of differences between the King and the Emperor penguins as they tend to look similar. 
Size Sort w/o Labels

Linked up here- find More Fun Activities this week:


Saturday, March 10, 2012

Directional Words- Free Printable

My son absolutely loves the book Inside Outside Upside Down by Stan and Jan Berenstain. I thought these activities would be a great way to reinforce the ideas and practice the sight words within the book. 

The first page is a set of three part cards I used to introduce the words. 

The next are some pages you can use as games or to practice reading for the bigger kids. I included some more ideas in the download for you. 

Click on the link below the picture to download in google docs. 

Linked Up: 

Friday, March 9, 2012

Montessori Inspired Sensory Crawl for the Babies


So this afternoon I had some rare time with just Indie and I thought this would be a great activity to keep her occupied and out of my cabinets for just a little bit.


I used pillows of different sizes. For older kids you can extend the activity with different textures. An outdoor mat, bubble wrap, sandpaper, woolly blanket would all work great. Use your imagination and whatever you have on hand. 


Super easy, totally free, and a great way to spend the afternoon. 


Linked Up This Week:

Thrifty Thursday
Montessori Monday


Monday, November 28, 2011

Christmas Preschool Pack- Update

I added some pages to the Christmas Preschool Pack I shared a couple weeks ago. Please enjoy!


contains: 
3 mazes, easy-hard
pre writing
rhyming pairs
beginning letter sounds
cut and paste
practice with syllables
matching game
size sorting
abab pattern
& simple board game


Linked Up!! Check out all these really great ideas!
TGIF Linky Party #7
Thrifty Thursday Linky Party

Saturday, October 29, 2011

Pipe Cleaners and Ribbon

I know the last post was pretty much geared towards what we've been doing with Bear so I thought today I'd throw up a short one on what little Indie has been doing. Here's some baby love:


Indie's been doing such a great job sitting I thought it'd be the perfect time to introduce some fine motor skills.

 Here is an old oxiclean container, some scrapbook paper, and pipe cleaners. She had a blast dumping and chewing. It was fun to see her face light up when we cheered things she did well- like hand me a pipe cleaner or pick one up off the floor.


 I also taped the bottom to protect the paper a bit from being chewed on. 

The other fun activity we started was an old tissue box that I filled with fabric scraps and ribbon. Same ideas as above, just different textures. 


That's it! Now go play!